STATIC

All You Need To Know In Home Remodeling

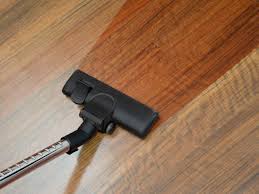
How to Do an Electrical Walk-Through of Your Home

Taking an electrical walk-through of your house with a contractor before the drywall goes up is a great way to get the best lighting plan for your home and save on costly fixes after the fact.

Review Your Ideabooks

Go back through your ideabooks of spaces you like and home in on the lighting in those photos. Can you identify where the lighting source is located and what type of fixture is being used? Jot down notes, such as “need an outlet under the sofa” and “love the cove light in this dining room.”

Prepare a Floor Plan

Print out a floor plan and sketch in your anticipated furniture layout. If you’re working with an interior designer, solicit their help. Don’t just look to the ceiling for placement of overhead lights. Mark walls that you might use for hanging art and highlight dark corners that could benefit from additional light.

Come Prepared

Make sure you or your contractor come with a floor plan, a tape measure, permanent markers and a clipboard. It never hurts to have a tape measure to figure out spacing and furniture arrangement. Permanent markers will allow you to mark the studs and subfloor with locations. And the clipboard? It may be the only clean writing surface in the home

Walk, Don’t Run

Walk through the home room by room, and expect to spend several hours if you are building a new home. Compare your marked-up floor plan with the actual structure to make sure your preferred light fixture is possible in that location.

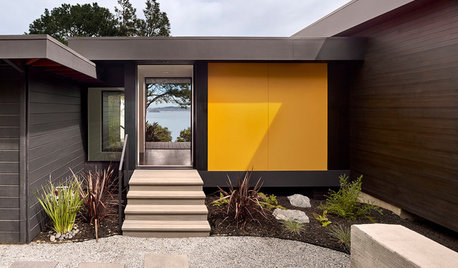
Construction Contracts: What to Know About Estimates vs. Bids

When homeowners are planning a remodeling or construction project, one of the first things they usually want to know is how much the work will cost. Part of asking about cost is not just defining what the work will be but also knowing what form you would like the contract to take — fixed price (also known as a bid) or time and materials (also known as cost plus or estimate of cost). Understanding the subtleties of these contract forms will help you decide which is right for you.

Fixed Price

A fixed-price proposal, also known as a bid, guarantees that a specific amount of work will be accomplished for a specific price. For example, a bid might be: “Three layers of roofing will be removed and replaced with 1,000 square feet of new 30-year CertainTeed composition roofing, including starter flashing, ridge vents and underlayment for $5,000 plus tax.”

The idea with a fixed-price proposal is that the cost will not exceed the agreed-upon price unless work is added, subtracted or changed. For instance, upgrading to a 40-year product would increase the cost of the material and labor. Similarly, if there isn’t a plywood substrate, installing plywood under the roofing would be an added cost. Those costs would be documented in a change order, which shows the change in cost to the contract price.

Pros of fixed price. Bids are the preferred method of contracting for many firms and homeowners. Homeowners choose it for a variety of reasons. Many like knowing that there is a not-to-exceed amount for the project, barring any change orders.

The fee for work is usually paid on a schedule that is tied to the calendar or to milestones, like the completion of framing or installing Sheetrock. That means checks are written less frequently and for a predictable amount. Some people are more comfortable having a specific price rather than one that can vary based on actual cost. Others want to be assured they are getting the lowest possible price by comparing bids from several contractors.

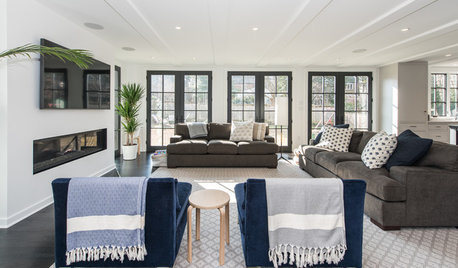
Remodels That Make Good Resale Value Sense — and That Don’t

Repeat after me: I am the master of my remodel. Perhaps you should say it again, because sadly, it’s not always so. Remodels sometimes have a tendency to develop their own inertia, as decisions lead to new dilemmas, unintended consequences and surprising outcomes. In some cases, these flights of fancy are perfectly acceptable, provided the design and completed execution truly align with the vision and budget.

But if your budget is a concern, and the wise investment of limited home improvement dollars matters, then there are a few basic guidelines you should familiarize yourself with before planning your remodel. Today we review remodels that typically make good financial sense, providing a nice return on the investment at the time of resale

Kitchens. Updating a tired old kitchen is one of the wisest methods, and a tried-and-true one, of increasing the value of your home. When planning a kitchen remodel, and making design decisions and selections for plumbing fixtures, appliances, cabinets and countertop materials, you should determine whether you are prioritizing your own design aesthetic or the return on your investment.

For example, using the existing kitchen layout and affordable cosmetic materials is a sure way to keep the cost of your kitchen remodel manageable. When you start tearing out walls, bumping out the exterior home footprint to gain a few feet, and moving plumbing fixtures and appliances, the cost of the remodel will jump and your dollars will be less efficiently spent.

Adding living space. A straightforward addition of a new living room space is typically a very good investment. Newly added square footage generally increases your home’s value. There are certain costs that will be associated with your addition regardless of the size. New square footage will require the demolition of existing exterior walls, a new foundation, a new roof, new exterior siding and probably new windows. If you are going to incur these expenses, it’s important to get some bang for your buck. It’s important that the added room is sized so that the space can be efficiently produced.

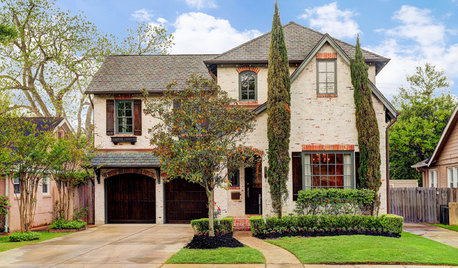
How Much It Costs to Work With an Architect

If you’re planning to remodel your home or build a new one, an architect could be a key individual to hire. These professionals can not only design your new home but can also manage the construction process so you don’t have to. But how much does it cost to hire one?

What Do Architects Do?

Architects listen to your ideas and build on them to design a home that’s often better than what you originally imagined.

Design homes and home remodels. Residential architects specialize in designing homes, both from scratch and as remodels or additions to existing homes. To get started, your architect will ask questions about how you live, why you want to remodel or build and, if you’re remodeling, how you live in your home and what’s currently not working for you.

Analyze your site. Architects can glean information about a particular property to help you decide where to best position your home on the land — or whether to buy a property in the first place. “We look at the topography, slopes and flat spots, sinkholes, rock outcrops and soil features that are significant,”

Document your home. When remodeling, it’s a good idea before you make any changes to understand which of your home’s walls are load-bearing and where the electrical and HVAC are located. Architects document a home’s existing conditions through “a detailed set of drawings that show the interior and exterior of the space,”

How to Get Your Pendant Light Right

Pendant fixtures have become a popular lighting choice for a wide range of rooms. Being aware of a few basic rules of thumb can prove to be very helpful — both in selecting a fixture for a specific location and for determining how high to hang it

Over a Table

The recommended height to hang a pendant above a table is 28 to 32 inches, but the fixture can be hung slightly higher or lower depending on personal preference, fixture size and ceiling height.

Address whether or not the fixture is to provide task or ambient light (or both) and select a fixture which meets the lighting needs of the location to be hung. A large drum pendant hung over a table not only anchors the vignette, but if placed on a dimmer the fixture can provide brighter light for any tasks done at the table and softer light while dining.

Hanging multiple pendants above a rectangular table can be a very effective choice, not only to properly light the entire table surface, but also for aesthetics. Here the pendants are hung sightly lower than in the previous example and both look appropriate for their specific spaces.

In the Hallway

Fixtures hung in an entry or hallway can add a lot of drama and beauty, casting shadows while providing light. In spaces with tall ceilings it is important that the fixtures not be hung so high that they are outside of the line of sight while standing in the space.

Reasons Why You Need To Install Hardwood Flooring

The Best Way to Clean Wood Floors

Hardwood flooring manufacturers recommend using the least intrusive cleaning techniques possible for your wood floors. If you sweep and vacuum often, you shouldn’t have to do much else, but when a cleaner is needed, it should be a pH-neutral one. Acidic or caustic cleaners can etch the finish and make it look hazy, abrasive cleaners can scratch, and oil soaps can leave residues that make the floor look worse than it did before cleaning.

You’re Cleaning the Finish, Not the Wood

Most contemporary hardwood floors have a coating of polyurethane varnish, and when you wash the floor, you’re really washing the finish. Although it’s durable, polyurethane scratches, and certain chemicals react with it to make it appear cloudy. Ammonia has a high pH and can basically corrode polyurethane, and full-strength vinegar has a low pH that can etch it. Many experts recommend cleaning hardwood floors with a solution of vinegar and water, but you should never use vinegar at full strength. Abrasive cleaners, such as scouring powder, dull the finish in a different way; they leave microscopic scratches. Steel wool and abrasive brushes can have the same effect.

Avoid Oily Cleaning Products

Many consumers have complained about certain wood cleaning products available on the market. These products do a good job on your wood furniture but aren’t good for your floors, because they contain vegetable oils or waxes that remain on the surface after the cleaning solvent has evaporated. This residue dulls the finish, attracts dirt and causes visible streaking. It builds up as you continue using the product for cleaning and must ultimately be removed to make your floors look clean. Some flooring experts caution that paste wax produces the same dulling and streaking problems and recommend avoiding it.

Removing Oil Soap Residue

Although you should normally avoid ammonia when cleaning hardwood floors, removal of the residue from oil soap is a special case. Mix a cleaning solution consisting of 1/2 cup of ammonia per gallon of water, or mix concentrated window cleaner with water in a 1-to-3 ratio. Water is just as dangerous for wood floors as ammonia, so you must use this solution with care. Get a sponge or microfiber mop wet; spread a thin film and let it stand for five minutes. Wipe up the solution with a clean, dry cloth; then use another clean cloth to go over the floor to ensure it’s dry.

The best way to clean wood floors

In addition to using a damp mop to clean wood flooring, there are a handful of other useful tips and tricks to consider. Keep reading to find out the best way to clean surface-sealed wood floors, including what to avoid.

Steer clear of furniture sprays

Surface-sealed wood flooring does not need oil or wax to shine. In fact, using greasy formulas — such as furniture spray or the paste wax used on other types of wood floor finishes — can make surface-sealed floors slippery. Not to mention: Applying wax can be time-consuming and complicated (which is why so many newer wood floors are surface-sealed).

Use a gentle cleanser

When cleaning your surface-sealed wood floors, be sure to avoid products with high alkaline levels, abrasive formulas, or ammonia — all of these can scratch the finish. Instead, use a gentle pH-balanced soap (or a little bit of dishwashing soap) mixed in warm water. To clean, simply dunk the mop inside the mixture and ring out until damp. Then, apply the mop to the surface and get cleaning!

Don’t use vinegar to clean

Vinegar might be a common DIY cleaning ingredient, but it has no business on your wood floors. In fact, some suggest vinegar gives wood floors a dingy appeal. In addition, you don’t want to use plain water either, as that will only spread the grime around — not lift it from the surface. Soapy water is the way to go.

Ask your floor finisher for recommendations

If you’re stuck on what type of floor cleaner to use, reach out to the floor finisher for a recommendation. As experts — with knowledge of your specific floors — they should be able to recommend a safe wood floor cleaner.

Clean often

We can all agree: Cleaning wood floors is usually the very last thing we want to do. Luckily, there is a way to prolong the life of your clean. In areas with high traffic — e.g., the dining room, kitchen, or family room — sweep or Swiffer often to help maintain cleaner-looking floors.

Replace dirty water

Cleaning with dirty water defeats the purpose. When mopping wood floors, swap out the water as often as needed to ensure you’re using clean soapy water. After you’re done mopping with soapy water, go over the areas with fresh, clean water (hold the soap!) to get rid of any leftover residue.

Get rid of scratches with baking soda

If you notice a few scratches while cleaning, don’t panic. Reach for a damp sponge and apply a small amount of baking soda. Once you’re armed and ready, rub the sponge gently across the floors for less-noticeable scuffs and scratches.

What Can I Use to Get Smudges & Smears Off My Hardwood Floor?

While some people prefer the ease and comfort of carpet covering the floors of their house, many opt for the polished look of a hardwood floor. Though this can be a significant investment in your house, the wooden floors can pay off with their sharp looks if you keep them clean. This can sometimes be harder than it sounds, as your floors may tend to collect smudges and smears. But these eyesores can be removed with some easy techniques.

Water-Based Cleaners

As one of the cheapest and easiest methods of removing smudges and smears from your hardwood floors, water-based cleaners are safe and can be used on floors of different finishes. With a water-based cleaner, you should normally apply about three coats onto your floor, but it may take as much as four in areas with heavy traffic or multiple trouble spots to remove the smudges. These cleaners will not react with the oil or wax-based finish of your floor, but they work to effectively remove the spots and blemishes.

pH-Neutral Cleaners

A pH-neutral cleaner can be one of the most effective tools in cleaning your finished floor, and leaves a glossy shine on your hardwoods. In addition to removing the smears and smudges, this type of cleaner can dissolve dirt and grease as well. Be careful, however, to monitor your use of this type of cleaner. Extended use of pH-neutral cleaners may leave your floor dull over time. They are also not as safe as water-based cleaners, and you should be careful not to expose your skin to them.

A Damp Mop

A much simpler way to clean your hardwood floors, the effectiveness of a damp mop should not be underestimated. If the smudges and smears are not deep into the surface, a damp mop can get rid of the spots in as little as two cleanings. Start by wetting your mop slightly, wringing it out to almost dry, and then going over your floor twice. The first pass dissolves the smudges, smears or dirt, and the second pass gives you the chance to wipe them off of the floor.

Wood Washes

A wood wash is a type of product that is meant specifically for use with wooden items, such as your hardwood floors. This cleaning solution is safe on a glossy finish, and is both concentrated and inexpensive. Apply the wood wash with a mop, or apply it while on your hands and knees. This will allow you to really attack the smudges and smears with a soft brush or with a wet rag. After scrubbing the spots, you can then remove them from the floor with a clean pass with your rag or mop.

Cleaning your hardwood floors:

When it comes to cleaning your hardwood floors, it is important to recall how your hardwood floors are sealed because it is the finish, not the wood type, that determines how you should clean your floors.

There are three different types of finishes that your hardwood floor may have. These finish types are:

  • Surface-sealed floors: new wood floors are usually sealed with urethane, polyurethane, or polyacrylic, and these types of seals render the floor mostly stain and water damage resistant. Surface sealed floors are fairly easy to care for and clean.
  • Penetrating-seal-treated and oil-treated floors: a penetrating soil or an oil finish soaks into the grain of the wood and hardens. Penetrating seal-treated or oil-treated are a bit more delicate and must be pampered with liquid or paste wax.
  • Lacquered, shellacked, varnished, or untreated floors: These types of finishes are technically considered surface finishes, but floors covered with lacquers, shellacs, or varnishes are not as resistant to moisture, spills, wear, and tear as other surface-sealed floors are. Therefore, floors with these finishes should be treated as carefully as penetrating-seal-treated or oil-treated floors.

Steps to Remove the Footprints:

  • To cut through the build up, it will require a mild acid (vinegar) for removal. Once the build up is removed, the footprints will not be noticeable.
  • Start by mixing about ½ cup to 1 cup of vinegar per gallon of warm water in the bucket.
  • Wet a mop (for flooring) or soft cloth (for other wood surfaces) in the solution, then wring it out. Make sure you get rid of all excess water until the mop or cloth is just damp.
  • Wipe the surface with the vinegar solution, rinsing the mop/cloth frequently.
  • Allow the wood surface to air dry. If there are any wet spots lingering, towel dry them.
  • If the footprints remain, it means there is still build up present. If the waxes and wood polishers have been used for some time, it may necessary to repeat the above steps to remove the additional build up.

Contemporary Kitchen Faucet

What causes a faucet to drip?

A leaky faucet, if left unrepaired, can become a major problem beyond the money it’s costing you on your water bill. A faucet dripping water can be indicative of a larger problem that could cost you hundreds of dollars. The most common causes for sink faucets leaking include defective parts like o-rings, washers and gaskets. Corrosion and mineral depostis can also lead to sink faucets leaking.

There may be several reasons behind why your faucet is dripping. Below we review some of the most common causes of a leaky faucet.

Problem in the O ring:

A stem screw is used to hold the handle of a faucet in place. This stem screw includes a small disc attached to it, known as the O ring. This is an integral place where dripping can occur. The O ring can become loose or wear out over regular use, causing the faucet to drip near the handle. Replacing the damaged O ring will fix it if this is the issue. This problem occurs specifically in cartridge faucets.

Corroded Valve Seat:

A valve seat serves as a connection between the faucet and the spout in the compression mechanism. Accumulation of water sediments can cause the valve seat to corrode, causing leakage around the spout area. Make sure that you clean the valve seat regularly with the help of a professional plumber.

Worn out Washer:

This is one of the most common causes behind a dripping faucet. During each use, the washer is forced against the valve seat, and this constant friction causes it to wear out. As a result, dripping is noticed around the spout. Dripping caused by worn-out rubber washers can be mended by replacing the washer. This type of leak is found in a compression faucet.

Improper Installation of Washer:

Often, if the washer is not installed properly or is not the right size, it can cause a leaky faucet. We suggest hiring a professional plumber to help you install the washer properly, allowing you to say goodbye to your leak.

Broken Parts

If the leak is coming from the pipes that are under your sink, the most likely issue is a broken fitting or pipe. If this is the case, it’s best to call a plumber, Broken pipeas they will fix the broken pipe problem and ensure no other issues are present.

Loose Parts

Modern faucets have an array of small parts that work together to deliver seamless water flow. After years of use, the parts can wear out and no longer work efficiently.

If the faucet has started to leak close to the base, it may be that the packing nut or adjusting ring is loose. If you have a rotary ball faucet, all you have to do is remove the handle and tighten up the adjusting ring. If there’s still a leak coming from the base, it may be time to replace the seals or springs

Worn-Out Cartridge

A leak in a cartridge faucet could also be due to the cartridge itself, which may need to be replaced. You’ll need to make sure you have a matching replacement cartridge to swap it with.

Worn-Out Seals

Much like the valve seats, inlet and outlet seals can become corroded by the accumulation of water sediments.

Taking the DIY Approach

If you want to try to handle a leaking faucet on your own, there are several steps you can use. These include:

Step 1: Determine the Type of Faucet You Have

You need to first determine the type of faucet you have. This will dictate the direction of the repair. The three most common types of faucets include:

  1. Ceramic disk faucets
  2. Ball faucets
  3. Cartridge faucets

Once you know what type of faucet you are working with, move on to the next step.

Step 2: Prep Your Work Area

Before doing any work on your sink or faucet, make sure to turn off the water supply. You also need to plug the drain with a rag or some other barrier to prevent losing anything down the drain. You don’t want to lose any of the parts! It’s also necessary to remove the decorative part from the handles. There should also be a screw that connects the faucet’s handle to the stem that needs to be unscrewed, and the handle removed.

Step 3: Checking the Parts and Components

Once you have removed the handle, you can use your wrench to loosen the packing nut and the stem and inspect these parts for damage. Also, check the washer and O-ring in the valve seat. Try replacing the washer to see if that fixes the leak. If none of these steps work, it’s time to call in a plumber. They can quickly and easily identify the underlying issue.

Essential Services You Must Look For When Hiring Wedding Photographer

Essential Equipment for Wedding Photographers

Photographing weddings can be a lot of fun, and come with it’s fair share of challenges, too. Bringing along the right gear for the job is one way to make sure that you will be able to get all the shots you want (and need), and more importantly, get the ones the couple you are working for want!

As a new wedding photographer, it can feel like an uphill challenge to get all the photography equipment that you need and want to create the best art possible for your clients. Unless you are a lucky person who has an infinite amount of money to spend, it will become necessary to determine what items are “essentials,” what items would make life a little easier, and what items are more novelty. For sure, we have a mixed bag of equipment ourselves – some that we use constantly, while others we only use in special instances. For the sake of being transparent, in the first year of running our business, we spent around $30,000 upgrading our old equipment, and getting professional level gear. Keep in mind, this is photography equipment for two photographers, so we would expect a solo photographer to be spending around 15k – 20k ideally assuming you need to purchase new or update camera bodies, lenses, flashes, and other types of equipment that will be of significant use during the wedding day.

Contained below will be referral links to other websites. These are provided for your benefit – as they include more detailed information regarding each product (most importantly to us: a lot of user reviews!). Some items are also available in special package deals (at same cost) that may not be available in store or elsewhere online, which may include some freebies like SD card(s), camera backpacks, tripods/monopods, etc. The majority of our large purchases are handled through Amazon for this reason + their consumer friendly return policy. Any purchases made through these links do benefit us as well, as we earn a commission from each sale at absolutely no additional cost to you. There is no obligation, but if you feel the content here is useful and you are looking to purchase new wedding photography equipment, please consider using these so as to support future content like this on our website.

All products showcased below are representative of photography gear we use and would recommend to a friend. Our experience with investing in our own photography business has taught us much, and we have made mistakes in the past with purchasing gear we end up not needing, or ended up replacing – in some cases unintentionally. We do not link to gear that we do not get value from.

CAMERA AND BACKUP CAMERA

Let’s start with the obvious! You will need a camera. And not just any “camera,” but a good quality, professional level camera suitable for a diverse range of environments that come up from wedding to wedding – and within an individual wedding day, too. The camera body you choose to use will be up to you, your budget restraints, and specific considerations that you may want to make. These days, there are also considerations to be had for mirrorless camera body options, though we do not use these at this time

How to Master the Art of Wedding Photography

Wedding photography is the nuanced art of capturing one of the most important days in a person’s life. Wedding photographers provide a very special service to society, giving shape to the manner in which families remember the day they came together.

Wedding photography is one of the most financially rewarding artistic professions in vogue today because it is indispensable to the newlyweds’ grander theme of romance. It has also become the most common option for practitioners of the craft of photography to keep earning a living wage.

As a prevalent part of commercial photography, wedding photography encompasses several fertile branches of photography. It may include portrait photography, concept, documentary, and candid photography. An imaginative wedding photographer will not just document weddings and related events. She can also borrow conventions from landscape photography, architecture, interior design, event planning, and storytelling. A wedding photography assignment can include capturing records of elaborate ceremonies and bridal portraits before the wedding, including the preparation of announcements, thank you cards, etc. It may also include post-wedding activities such as the reception.

How to become a great wedding photographer

A good wedding photographer is comfortable around people and has a trustworthy personality. She has an eye for detail and practices discretion. Here are some of the best qualities that make for a great wedding photographer.

Dealing with Pressure

Since a couple wants their wedding day to be documented in the most comprehensive manner possible, they would want to invest in hiring a good wedding photographer. Because of this, there is pressure on the photographer to perform exceptionally well.

HOW TO INQUIRE WITH YOUR WEDDING PHOTOGRAPHER | FOR THE BRIDE

As you can see, this particular inquiry gives me nothing really. No date, what type of session, etc. So, I will have to write an email back asking those things before I can even give this person a quote.

Your date: As you can imagine, this is the number one thing that I need from potential clients when they inquire! No point of both of us getting excited and wanting to book if I do not know what date it is, and if my services are available to you! One piece of advice:  Don’t book any vendors until you’ve secured a venue and therefore, a date.  If your date switches, your photographer and other vendors may already be booked.

Your Venue: Please be specific on this one! Understand that, especially for here in Hawaii, saying “Hawaii” isn’t Specific enough, and even saying “Four Seasons Hawaii” is not specific. Why? Because there are 8 Hawaiian Islands, and there are 4 Four Seasons, each on a different island! Same thing goes for any type of session- knowing which island and where you are at is key!

Contact information: Please make sure you leave both an email and phone number! Don’t worry, I’m not calling unless I have to!! But sometimes, keyboard mistakes are made, and I will try and email a person back, and it gets bounced back to me, and I have no way of contacting them to let them know!

OTHER INFORMATION TO SHARE IF YOU HAVE:

Budget: I think this is a big one! Hopefully, you have looked on my website, you have seen what my starting prices are, so you know, right off the back, if I am in your price range! Again, don’t want to waste your time! But, also know, I can customize your package as well!

Hours of Coverage:  I know you may not have this right off the top of your head, but you may know if you want a full day wedding package, an elopement package, or somewhere in between!

A note about you:  Tell me about you! Or something you want from me! Just jumpstart us getting to know each other, because if you chose me, we will know each other very well!

Things Your Photographer Wishes You’d Do

Being a wedding photographer is a huge responsibility; one we don’t take lightly. Our job is to literally come alongside our couples and help make their day the absolute best it can be. Wedding photographers put their heart and soul into each one of their couples’ big days. By the time a bride books with us through the journey to her wedding day, we’ve had back and forth communication, Skype planning dates, and multiple conversations. We’re also the one vendor who quite literally is by the bride and groom’s side from beginning to end on their wedding day. It’s fair to say because of the energy and time we invest, we often don’t consider ourselves just a vendor on someone’s wedding day, but a trusted friend.

I make it a priority to invest time into creating a friendship with my brides and grooms, as do most wedding photographers in the industry. It’s important to me that my couples and I are on the same page and that we click. Who wants a stranger they don’t get along with following them around on their wedding day ?? Uh, NO ONE!

Send Us Your Wedding Invitation

Okay. Duh. If you booked us, we obviously already know when and where your wedding is. We don’t want an invite for logistical purposes. There’s just something so exciting about getting mail from your couples that lets you know they count you as a guest at their wedding- not just the photographer.

Tell Us You Trust Us.. and Then Actually Trust Us

If you’ve hired us to photograph your wedding, we hope that means you fully trust us to create magic for you on your wedding day. Trust (to us) means asking what time is best for photos and adjusting your timeline accordingly. Trust is giving us the authority to make decisions regarding the location and time of your portraits so they’ll be the best ever. Trust is NOT giving us an entire page long shot list you got from Pinterest. If you truly trust us to capture your wedding authentically, we don’t need a shot list. We want to create photos for you that OTHER people will pin on Pinterest

Text Us Photos of Your Dress

This might just be me, but I’m a hopeless romantic. I LOVE it when my brides text or email me photos of their wedding dress once they’ve chosen it. Maybe it’s the giddy little girl inside me, but I adore texting and sending silly GIFS to my brides. I get to connect with them on another level and show them how excited I am to capture their wedding day.

best outdoor wedding photography tips (including night and lighting tips))

Today we’re sharing our best outdoor wedding photography tips for day or night. (Plus two bonus tips on star photos and lighting for outdoor photos.) Whether you’re planning an outdoor wedding or photographing one, it’s important to be one with the elements. The outdoor wedding photography ideas below are a comprehensive guide to get you started taking better outdoor wedding photos.

Most of our wedding photography advice below is for photographers. However, we threw in some tips for brides too. At the end of a few sections we mention a wedding planning tip gleaned from the topic. You can always skip to the bottom for a concise list of the tips for brides. And don’t miss our Wedding photography tips for brides

battling the mid-day sun (seek shade)

One of the biggest challenges of photographing an outdoor wedding is the lack of control over the light. Sure you can influence the timeline (see next section) or you can add artificial light which we’ll talk about later. But odds are, you’re going to have to shoot something in the middle of the day.

simple (but effective) timeline adjustments for better photos

As photographers, setting the timeline can be incredibly helpful in getting the best photos. If your couple schedules portraits at noon and the sun is directly overhead, it is going to be much harder than if you have a sunset portrait session (see above section).

control the direction of the sun

Obviously we can’t tell the sun where to go but we can move ourselves! For our more adventurous elopement couples, this usually means we can help them decide where the ceremony should be and what direction they should face. For our couples getting married at a venue that has an established ceremony site, this often means choosing which side of the ceremony to shoot from. Typically, I will opt to shoot from the side with more direct sunlight. This allows me to expose for peoples faces and get a good exposure of the backdrop as well.

New-Build Vs 14-Week-Build Home Renovation

How do you pay for home renovations?

Maybe you’re tired of staring at the aging cabinetry and outdated countertops that adorn your kitchen. Or maybe you’re worried that your deck really will cave in the next time you attempt to eat outdoors. There are plenty of good reasons to invest in home improvements, whether your goal is to increase your property’s resale value, enhance your quality of life, or both. But renovations cost money, so you’ll need to consider the best way to pay for yours. Here are some options to think about.

Tap your savings

If you have money in a savings account you can use to fund your home improvements, then withdrawing that cash is your best bet. That way, you won’t incur interest charges in the course of renovating your property, and you’ll gain peace of mind by not taking on debt and having additional monthly payments hanging over your head.

That said, don’t deplete your emergency fund to pay for work that’s being done on your home. In fact, don’t even make a tiny withdrawal from that account. Your emergency fund should be saved for unplanned expenses only, and if you raid yours to fund renovations, you’ll risk coming up short when an unavoidable bill pops up later on.

Get Rid of Your Private Mortgage Insurance

With home values rising again in many real estate markets, it’s possible your home value is now high enough to allow you to cancel your private mortgage insurance. Most mortgage banks let you drop your policy once you have 20% equity (for example, your home value is $100,000 and your mortgage is $80,000, leaving you with $20,000 in equity).

File an Amended Return

File an amended return for a home-related tax deduction or credit you failed to take. It’s easy to make a common home owner tax mistake, such as not taking a deduction when you modify your home for medical reasons or when your home was damaged in a disaster. It’s quick and easy to amend your return and get a refund to help fund your renovation.

Use your credit cards

Let’s be clear: Charging home renovations on a credit card isn’t the best idea, as you’ll risk paying a ton of interest on that debt. But if you’re desperate to get that work done (say, you have a bathroom that’s basically unusable in its current state), and you can’t borrow against your home or qualify for a personal loan, then credit cards may be your only option. If that’s the case, proceed with caution, and keep your renovation costs as low as possible.

Of course, if you have enough money in savings to pay for your renovations, but are also able to charge them on a credit card without incurring added costs (some contractors or companies charge extra for credit card usage), then it pays to do so. That way, you can rack up some reward points, and then pay your balance in full before interest starts accruing.

Your goal in funding a home renovation project should be to walk away with as little debt as possible. If you’re not in a position to pay for your home improvements outright, it could make sense to put off that work for another year or two, boost your savings, and then cover your renovations with cash. That way, you won’t risk taking on debt that you’ll struggle to keep up with after the fact.

Mortgage refinancing

While it may seem like the most daunting option, refinancing your mortgage can ultimately be the most cost-effective way to fund a home renovation project if interest rates are lower than the existing interest rate on your mortgage.

Personal loans

If you have a fixed amount for your home renovation budget, and it’s relatively small, you might instead want to consider a personal loan.

Personal loans are also quick to secure and require relatively little paperwork. Personal loans offer you flexibility when it comes to deciding exactly what you want to do with your loan. If you’ve started pricing your renovation and predict that the dollar figure could increase over your initial estimates, skipping both the personal loan and credit card options. Once project costs increase, tapping your home equity may become advantageous due to the low interest rate.

Home equity

If you have enough equity in your home, you’ll have the option to borrow against it to fund your renovations. You can do this in two ways — with a home equity loan, or a home equity line of credit (HELOC). With the former, you borrow a preset amount of money up front, and then repay it over time. With the latter, you’re given access to a certain amount of money, and you can make withdrawals against that line of credit as you need to.

Qualifying for a home equity loan or HELOC is fairly easy, because your property is used as collateral. If you don’t make payments on your loan, your lender can seize your home (which is a bad thing for you, but protection for your lender). As such, you might snag a pretty favorable interest rate on a home equity loan or HELOC. But only borrow what you can easily afford to pay back, because you really don’t want to risk losing your home.

Before You Start Home Renovations…

First, make sure your improvements are suitable for your home and your neighborhood. Doing a top of the line remodel with high-end finishes might price you out of your area. Also, before you dive into a project, consider how long you plan to live in your home. If you plan to be in your home for several years, think about projects in which you’ll get enjoyment.

There is no sense in sinking thousands into a new gourmet kitchen if you don’t cook. Or doing a complete remodel of a guest bathroom rarely used. If you plan to move soon, think about resale. Will you be able to recoup the costs of the renovations? Are the finishes neutral enough to appeal to most buyers? Are the upgrades what one would expect in your neighborhood?

Things You Should Consider When Looking For A Car Accident Lawyer

How do you win a car accident lawsuit?

If you have been injured in a motor vehicle accident, you are unlikely to ever forget the crash. For some victims, the emotional impact is as devastating as the physical injuries. Moreover, many victims suffer financial hardship on top of the physical and emotional injuries. If another party was at fault in the collision, you may be entitled to compensation for all of your injuries.

Hiring an experienced  traffic crash attorney is the first step toward recovering damages for your injuries; however, additional steps you can take other steps to improve your chances for compensation:

  • Seek medical treatment immediately.  Have a medical examination immediately following any collision, even if you think you were not injured. First, this helps ensures that all injuries, including any internal injuries, are diagnosed properly. Second, it provides a clear relationship between the accident and any injuries for which you seek compensation down the road.
  • Document the collision. Keep records of hospital bills, time missed from work, car repairs and prescription medication costs. Also, keep a pain journal to document your daily pain level as well as the accident’s mental and emotional effects.
  • Follow through.  Keep all doctor appointments and follow the prescribed course of treatment.
  • Do not communicate with anyone. Once you hire an attorney, let your attorney speak for you. This includes commenting on social media websites such as Facebook or Twitter. Remember, your comments could be used against you or misconstrued down the road.
  • Negotiate with your head, not your heart. When it comes time to consider an out-of-court settlement, listen to your attorney’s advice and discuss your options. All victims feel their case is worth a large amount of money.  Your attorney, however, will be able to give you a good idea of what a jury would say.

Scenarios Leading to Car Accident Lawsuits

What you must prove to win your car accident lawsuit depends, at least in part, on how the accident happened. Even the process of proving a claim for damages can vary depending on the circumstances. Some common scenarios that lead to someone having legal liability for a car accident include:

  • Another driver violates traffic laws.
  • Another driver operates a vehicle under the influence of drugs and alcohol.
  • A medical emergency resulting from medical malpractice leads to a car accident.
  • A poorly maintained road with potholes, sinkholes, or another hazard leads to an accident.
  • Malfunctioning traffic signals or train crossing signals lead to an accident.
  • A defective motor vehicle or motor vehicle part causes an accident.

Improving Profitability for Plaintiff’s Attorneys

Because most plaintiff’s attorneys get paid through a contingency fee agreement, the sooner a case settles, the sooner the plaintiff’s attorney gets paid. All else being equal, a quicker settlement payment is more profitable for the plaintiff’s attorney. This is because the longer a case goes on, the more time and work the plaintiff’s attorney must put into the case, with no guarantee of an increased settlement offer.

While settlement offers often rise as the lawsuit goes on, that’s not always the case. Even if a settlement offer goes up over the course of the lawsuit, there’s no guarantee the increase will rise in proportion to the additional work the plaintiff’s attorney must put in. Then there’s always the risk that if the plaintiff refuses a settlement and the case goes to trial, the plaintiff loses and the plaintiff’s attorney gets nothing.

How You Can Increase the Chances of A Successful Outcome

You can take several steps to support your claim in a personal injury lawsuit after a car accident.   First, collect any evidence of the accident.  This may include paperwork such as a police accident report, insurance and contact information for the other driver,  hospital and ambulance records, and photos of the accident scene.  Any documentation that supports your version of how the accident occurred will be helpful to your attorneys.

Second, write down as much as you can remember about the accident.  This could be a description of what happened and the times that events occurred (such as when the police and/or ambulance arrived).  It’s best to make notes of this information as soon as possible after the accident, while your memory is fresh; the longer you wait to chronicle the accident, the more likely it is that you may forget crucial details, such as whether the other driver made a statement to you about the accident.  Third, make a list of potential witnesses along with their contact information. This may involve listing each person riding in the car with you or the other driver,  anyone who saw what happened, and the police, firefighters or medical personnel who responded to the scene.  These people may help your attorney put together your claim for damages. Fourth — and most importantly — do not speak to the other driver or their insurance representative about the accident.  If they want to speak to you, you can simply tell them that you are considering filing a lawsuit and that they can talk to your attorney. Allowing your lawyer to handle conversations with insurance adjusters and other parties will help to ensure that you obtain the best possible outcome for your case.  Of course, if you have been seriously injured in a car accident, you may not be able to take these steps; these are only suggestions for anyone who is capable of gathering this information.

These innocent errors can affect a car accident lawsuit

There are many ways an unsuspecting auto accident victim’s case can be harmed – even when you’re trying to do the right thing. Here are 18 mistakes identified by our car accident lawyers that unfortunately, play a crucial role in hurting good people with legitimate car accident lawsuits.

Lying about injuries in a car accident in Michigan

Lying about injuries in a car accident is easy to avoid with your Michigan car accident lawsuit but the consequences can be disastrous for those who don’t. Providing false information on an insurance application can be used to VOID PERSONAL INJURY CLAIMS you may have, such as for uninsured motorist coverage.

Mistakes on your No-Fault forms

Paperwork involved in No-Fault claims include the submission of forms for replacement services (household services) and attendant care (nursing care) claims. These forms are required for you to receive reimbursement/payment for the services provided. But the accuracy of these submissions is critical to your car accident lawsuit. In the Michigan Court of Appeals opinion in Bahri v IDS Property, the court held that inaccurate submissions can result in a person losing all No-Fault benefits. In summary, the court stated the Plaintiff committed fraud because her replacement service claim was 19 days before the accident occurred and defense surveillance showed her doing things on certain days by herself, which her replacement services submissions claimed other people were doing for her. So please ensure your No-Fault submissions are accurate. Mistakes – even innocent mistakes – can get any accident victim labeled a “fraud” under this new case and result in the termination of all of your No-Fault insurance benefits.

Surveillance

Expect that your insurance company and the at-fault driver’s insurance company will conduct surveillance and hire investigators to take photos and videos of you at some time during your car accident lawsuit. If you have tried to do a task, admit you’ve tried it. Most people will understand if you had a good day, and attempted to do something. But no one understands when an auto accident victim denies something that is later caught on surveillance video.

Do not talk about your case

Insurance adjusters, defense lawyers, and sometimes jurors may try to contact you about your car accident lawsuit. Do NOT talk about your case with ANYONE hired by the at-fault driver or insurance company. If an adjuster wants to ask about your case, have her call your car accident lawyer.

Facebook, Twitter & other social media sites

Insurance adjusters and defense attorneys will investigate your Facebook, Twitter and related social media accounts, blogs or web pages – even when set as ‘private’ – and look for things that can help them avoid taking full responsibility for the harms they’ve caused. The purpose of this Internet research is to attempt to show that you are not as injured as you claim. Please be very careful about postings and photos of your activities. Avoid posting new items.

Get Auto Repair When Needed And Extend The Life Of Your Vehicle

Good Reasons to Buy an Auto Repair Business

Auto Repair Produces a Good Income

Information from a database which tracks financial information on small business sales, shows that auto repair shops enjoy a median cash flow of over 20% of revenues.  This means that if a shop has $750,000 in revenue it can generate an owner’s cash flow over $150,000.   This is also a business which can thrive in any economic climate.  During strong economies, auto repair shops can cater to both new and used car owners by offering standard maintenance and repairs for much better prices than those charged at auto dealerships.  During tough markets, consumers are more likely to hang onto their cars longer, considering it more economical to pay for car repairs than to buy a new car.

ower than Average Purchase Price

It’s not uncommon for franchises or businesses in a variety of industries to carry price tags of 2 to 3 times the amount of the owner’s cash flow.  According this is not true with auto repair shops which have an average cost of only 1.69 times the owner’s cash flow.  This means that, on the average, an auto repair business generating $150,000 in owner’s cash flow sells for about $254,000.  This makes buying an auto repair shop a much more affordable option for a business buyer.

Limited Cash Outlay

While operating an auto shop requires a certain amount of equipment and tools, owners do not have to worry about having their cash tied up in accounts receivable and extensive inventory.  Auto repair shops operate on a pay-at-the-time-of-service basis and very few stock large inventories of parts.  In most areas, parts can be obtained quickly from parts stores as the need arises.

Strong Industry Outlook

There are several trends which show that the outlook for independent auto repair shops is excellent.  For one thing, the number of cars on the road continues to grow.  It is estimated that there are over 247,000,000 vehicles registered in the United States and that number increases annually.  With just a few exceptions, the number of cars has increased over 3.5 million each year since 1960, and there is nothing to indicate that this trend will change

Positive Competitive Landscape

Unlike many brick and mortar businesses, auto repair shops have not been replaced by internet businesses. This industry also faces little consolidation.  While major auto dealers offer repairs, their market share has been shrinking.  One reason for this is that auto dealers charge significantly more for auto repair work than do small car repair shops, and a Consumer Report survey found that customers who go to independent auto repair shops report a higher satisfaction level than those who visit an auto dealer for repairs.  The independent market is highly fragmented and the typical auto repair shop may have just two to five employees.

ENGINE REPAIR

As the temperatures plunge, certain types of engine oil may not flow as easily as they did when it was warmer.  Makes sense, doesn’t it? Just like molasses gets thicker as the temperature goes down, engine oil does the same thing. So, maybe you’re wondering if you have to change your oil as the seasons change so it’s just the right thickness to lubricate your engine parts.

How well engine oil flows is called its viscosity. There are different types of oil—some that have just one viscosity and others called “multigrade” oils.  Here’s the difference.

A single viscosity oil will flow better when it’s hot but not as well when it’s cold.  A multigrade oil is engineered so that its flow properties at cold temperatures are different than they are at warm temperatures.  In other words, a multigrade oil can start out in colder temperatures acting like a thinner oil and then behave like a thicker oil when it’s warm.  That’s a pretty cool trick and it’s why multigrade engine oil is used in nearly all vehicles.  Your vehicle’s manufacturer has the correct viscosity of oil for your particular model included in the owner’s manual.

Another choice you have to make when it comes to engine oil is whether you use conventional oil, synthetic oil or a blend of the two.  Synthetic oils have some advantages over conventional, such as resisting breakdown better and withstanding higher temperatures.

Check with your service advisor to see which viscosity and type of oil is recommended for your vehicle.  It’s important that in cold weather, the oil flows through your engine at the right thickness so that parts are being properly lubricated.  That will make sure you’ll get good fuel economy and performance, no matter what the temperature is.

Things to Consider When Choosing a Mechanic

One of the best ways to choose your maintenance and repair mechanic? Word of mouth! Online sites like Yelp are good, but a great referral is golden!

Q: Is there a Master Technician on the premises?

A: You want to make sure that a factory-trained Master Technician is on site who provides oversight on all diagnostics, maintenance and repair jobs. One who is knowledgeable about the particular needs of older and newer models. All of the mechanics here have been mentored and trained under myself, a factory-trained Master Technician.

Q: Does the shop offer competitive prices?

A: At provide personalized attention, quality parts, convenience, efficiency, decades of experience, and prompt service all provided under great management at prices well below the dealerships. know you have a choice, but as your Lexus and Toyota auto mechanics, confident that boutique treatment and competitive pricing will steer you in direction where your needs never get lost in the shuffle.

Q: Does use genuine factory parts?

A: Quality shops use genuine factory parts. They last significantly longer and perform better. The parts at after-market stores, such as Pep Boys, may appear to be the same as those used at reputable independent shops, yet they are not! Those after-market parts are of a much lower  quality than genuine factory parts that we purchase directly from the dealerships ourselves to meet the highest quality standard the business has to offer for your vehicle.

Q: Does the shop offer a warranty on labor and parts and is the shop licensed and insured?

A: stand behind work. This means will diagnose issues with your Lexus, Toyota, or other Japanese model vehicle, discuss your options, and make appropriate repairs. will never make repairs that have not been approved in advance by you. In the event something is not right, you have a full year to bring it back for adjustments to the original repair at no additional cost to you. are licensed and insured, so  your vehicle is protected against any unforeseen incidents.

Auto Diagnosis

Diagnostic Services

Electronic Diagnosis

Computer Diagnosis

Experienced ASE Certified auto mechanic

Ford Factory training

Honda/Acura Factory training

certified staff help you.We’ll diagnose your check engine light, repair the problem, and get your car back to you in no time. are equipped to handle all  auto repairs. devote our time to specialty training every month so are prepared to handle any vehicle that hows up on door step. Trust in expertise to repair your vehicle properly, the first time. Don’t be fooled by imitators, a lot of repair shops around us claim to be certified and attend regular training, but have no certificates on their walls. proudly display in the show room to show our commitment to excellent service.

Transmission Repair

Automatic Transmission Check

A vehicle with typical automatic trans have 4 and up to 5 forward gear-ratios, a Neutral, a Reverse and Park gear. With automatic trans, the shifting of gears happens automatically after the vehicle is in Drive and unlike a “stick shift” or Manual Trans and there’s no demand for a clutch or shift. Automatic transmission repair is advanced and complex work based on all the parts that it’s comprised of. Be sure to have any auto transmission problems correctly evaluated by a professional auto mechanic.

Check the Clutche

There are various kinds of clutches, in both manual & automatic trans cars. A clutch helps your vehicle start & shift gears smoothly. The clutch in your car can sometimes wear out.

“4” wheel Drive Transmission

A 4-wheel (4×4) driving vehicle does have specific gears, with both back & front axles, including an entire transfer case. Vehicles with 4 wheel drive require maintenance services on the front differentials, rear differentials, transfer case, and trans fluids

THE LIFE OF A CAR MECHANIC

Being a Car Mechanic is a great job, especially if you love cars. Being able to check out lots of cool cars and see their insides, how they are created and what features they offer is very interesting and exciting at the same time. There’s always something nice to be had when it comes to being a mechanic. Because you can learn something new, sharpen your skills and all these things are super interesting and fun.

What do you do as a Mechanic?

A Car Mechanic can do a whole lot of things. You can opt for an oil change car service, you can diagnose check engine lights, replace head or taillight bulbs, check the engine, make sure that the dashboard works, check the electrical system and so on. The Car Mechanic will basically handle all kinds of auto maintenance and auto repair tasks. That’s why more and more auto shops want to keep their Car Mechanics or at least hire new ones. It’s important and it really helps them make sure that results are great and the experience will be worth it.

What is the average pay for a mechanic?

The average pay for a mechanic will differ, but the median salary in the US is around $39000-$40000 per year or something around those lines. Of course this will differ on the city

How long does it take to become a car mechanic?

Some would say that becoming a car mechanic is an ongoing and sometimes taxing job. But on the other hand it’s a very fulfilling one too. If you want to be a repair technician, you might have to study up to 3 years. Part specialists, service consultants or collision damage estimators will have to study for around 2 years. So yes, 2 years would be the average because that’s how much it takes to get certified. Yet you always improve yourself and learn new things as you go along.

The life of a Car Mechanic is always challenging because you never know what parts you will be working with or what you can expect. It’s certainly something distinct and unique, and it can bring in front great results all the time. It’s all about understanding the huge pressure that can appear and what challenges can arise, but at the same time you also have to adapt and learn new things. And once you do that it will be worth it!

Water Testing Methods: Measuring PH Levels In Water/Fluids

What is the best way to test the purity of a water sample?

Assuming that you are talking about quality of drinking water, It is not quite possible to check microbiological and chemical quality of water at home. You can check the pH of water at home using pH strips or pH indicator which you can get from a chemical store. The ideal pH of drinking water is 7.0 to 8.5

For checking the Total dissolved solids in water, you can use TDS meter, which you should be able to find in a laboratory store. Or you can take a particular volume of water sample in a pre-weighed dish and boil the water to complete evaporation, cool the dish and weigh it again and calculate the mg of solids left behind per litre. This will give you TDS of your water. A good quality water should have TDS of 30–300 ppm in my opinion.

For determining the mineral content like Ca, Mg, Sulphate Chloride etc, you need lab equipment and particular chemicals. If you can get access to those, you can follow methods given by BIS which you can find online

If you don’t have access to a laboratory, you can contact a NABL accredited lab in or near your city and send around 8 litres of water sample (or as advised by lab officials depending upon which parameters of water quality you are interested in. The NABL accredited labs are where all the food industries send their samples to, to get them tested, so you can rely upon their results. These labs can do testing of your sample for all the microbiological and chemical parameters of concern and send you the reports.

What type of home mold test should I use?

Home mold tests are cheap, easy to use, available at most hardware stores, and almost entirely useless. So the answer is none. You should use none of them.

A standard home mold test typically consists of a petri dish that you allow to sit in your home, along with a substance to create mold growth inside (usually something called potato dextrose). You leave the test out for a specified amount of time, and then you cap the petri dish and let it incubate for a specified amount of time. These times vary by brand, so follow the manufacturer’s guidelines. If mold grows, you have mold. If it doesn’t—well, you get the point.

Spoiler alert: there is mold in your air. Mold spores are in the air just about anywhere you could go, including inside your home. Testing for the presence of mold is like testing for the presence of air. It is there, we promise.

There are two critical questions to answer regarding mold in your home, and whether or not it is there at all is not one of them. The first is whether the amount of airborne mold spores found in your home is excessive. Since there is no official guideline from the EPA on how much mold is too much, this is usually done by comparing the concentration of mold spores floating in your home to the concentration of mold spores floating outside. It’s also a task for a professional.

You should schedule one of these tests if you believe for any reason you may have a mold issue but aren’t sure since you haven’t seen any. Often times, there is a musty smell that is the calling card of larger than average amounts of mold. If you find that you’re coughing or sneezing more than usual, that may be a sign of high mold concentration in your home as well.

What is Water Pollution?

The water they say is life, and indeed they were right. About 70% of the earth is water, which has undeniably become one of our greatest resources. When we were young, we learned about the various ways to conserve water because water is used in almost every important human chores and processes. Water is an essential element in both domestic as well as industrial purposes.

However, a closer inspection of our water resources today gives us a terrible shock. Water is now infested with various wastes ranging from floating plastic bags to chemical waste, converting our water bodies into a pool of poison.

Water pollution is an appalling problem, powerful enough to lead the world on a path of destruction. Water is a natural solvent, enabling most pollutants to dissolve in it easily and contaminate it.

The effect of water pollution is directly suffered by the organisms and vegetation that survive in water, including amphibians. On a human level, several people die each day due to the consumption of polluted and infected water

How to Test for Bacteria on Kitchen Counters

Some nasty bugs may lurk on your kitchen counters, in your kitchen drains and even inside your refrigerator. E. Coli and salmonella, two common types of bacteria found in beef and chicken, cause intense gastrointestinal discomfort, and even death if left untreated. Finding out if these unwelcome guests have taken up residence in your kitchen is the first step to being rid of them. Home testing for bacteria is simple and affordable, and doesn’t require advanced scientific knowledge.

Step 1

Prepare a small sample of agar in the petri dish as directed on its package. Agar is a gelatinous substance used in cooking that also serves as a growth medium suitable for science experiments. Refrigerate your sample upside down for the specified amount of time.

Step 2

Use a sterile swab to take your samples.

Rub a sterile swab over the areas of your counter most prone to collecting bacteria. Check a variety of different areas, focusing on where you most often handle your food. For example, you can collect samples from the edges of the sink, as well as the back of your spice rack and the bottom of your knife block. Use a light touch, but make full contact with the surface.

Step 3

Rub the swab containing your sample onto the prepared agar and close the petri dish.

Step 4

Place your petri dishes in an out-of-the way spot, out of direct light. It will take three to seven days for growth to appear.

Step 5

Examine your petri dishes as growth begins to appear. While determining the types of fungi and bacteria found must be left to the professionals, you can easily identify bacteria as small white and yellow spots that multiply quickly, and fungi as larger, colorful, furry areas. The more spots, the higher your bacterial count.

Physical parameters of water quality /Physical characteristic of water

These are some physical aspects of water quality that helps to determine whether water is polluted or not.

1. Color:

  • Pure water is colorless. Therefore any types of color appearance in water indicates water pollution.
  • Natural water system is often colored by foreign material. If color is due to suspended material, it is called as apparent color. Color given by dissolved material that remains even after removal of suspended material is called true color or real color.
  • The guideline value (maximum acceptable level) for color of drinking water is 15 TCU (True color unit).

2. Turbidity:

  • Pure water is clear and do not absorb light. Therefore if turbidity appears in water, it indicates water pollution.
  • Turbidity in water is given by various materials like suspended solid, dissolved materials and microbial loads. In general turbidity increases with increases in quantity of these materials in water. However different materials differ in their light absorption capacity.
  • Some materials that give turbidity may be toxic to consumers. Therefore turbid water is not suitable for drinking purposes. Furthermore turbidity decrease efficiency of disinfection process.
  • Materials that give turbidity provide attachment site for toxic chemicals.
  • Turbidity prevents penetration of light into deeper layer of natural water system that directly affects photosynthetic organism in bottom.
  • Drinking water should have turbidity less than 5 NTU (Naphthalometric turbidity unit)

3. Taste and odor:

  • Pure water is always tasteless and odorless. Therefore if any types of taste and odor is present, it indicates water pollution.
  • Water taste and odor may develops due to natural or artificial regions.
  • Artificial region for taste and odor in water is due to disinfection process (chlorination). Some natural impurities dissolved in water can also give taste and odor.
  • Inorganic salts such as NaCl, KCl etc dissolve in water give taste whereas compounds like H2S can give both taste and odor.
  • Compounds giving taste and odor to water may be toxic to consumer, so drinking water should be taste less and odor less.

4. Temperature:

  • Temperature is not directly used to evaluate whether water is potable (drinkable) or not.
  • In natural water system like lake and river, temperature is very important physical factor that determines water quality. If temperature increase, solubility of Oxygen in water decreases.
  • Furthermore rise in temperature increases the growth rate of aquatic microorganism, so they consume dissolved O2 faster and level of dissolved O2 decreases.
  • Similarly, temperature affects disinfection process because efficiency of disinfection is lower at lower temperature.

5. Foam:

  • Foam in water id due to foaming substances like detergents, soaps etc dissolve in water. Foam is regarded as dangerous in natural water system because it creates anaerobic condition.
  • Some foaming substance is toxic to consumers. Therefore water with foam is not suitable for drinking purposes.

6. Conductivity:

  • Conductivity of water is mainly due to presence of ionizable inorganic compounds.
  • Pure water has very low conductance. For example 1µ mho for distilled water. Therefore conductivity measurement indicates amount of ionizable inorganic compounds in water.

7. Total dissolved solid:

  • If water is filtered to remove suspended solid, the remaining solid in water indicates total dissolved solid.
  • Dissolved solid may be organic (animal or plants waste) or inorganic compounds (carbonate, sulfate, bicarbonate etc). These compounds give variety of effects like hardness, taste, odor etc depending on nature of dissolved solid.
  • If the dissolved solid in water exceeds 300 mg/ltr, it adversely affects living organisms as well as industrial products.

How To Control Bed Bugs

What Scent Keeps Bed Bugs Away?

Many bugs are repelled by certain smells, such as peppermint, tea tree oil, and lavender. As such, it makes sense that bed bugs too, would be repelled by certain smells. While bed bugs do try to avoid certain scents, there’s a lot of misinformation out there about what those smells are. So, what’s the truth?

One known scent that repels bed bugs is the pheromones secreted by the nymphs, or baby bed bugs. These are meant to keep male bed bugs away from the nymphs, so they don’t attempt to mate with them. These pheromones, though, only work on male bed bugs, and will do nothing to dissuade females from invading a space. It is still however, sold in many products on the market today. While using these products could be better than nothing, they won’t likely eliminate the problem completely.

Many people use essential oils to repel bed bugs, as well. The United States Department of Agriculture even conducted a study to determine if essential oils were effective in keeping bed bugs away. The results of the study were interesting. While bed bugs didn’t appear to be repelled by the smell of the oils, they did seem to have an effect on the bed bug’s body..

While not overly effective, the most useful essential oils for deterring bed bugs appear to be blood orange oil, paraffin oil, silicone oil, and spearmint oil. However, the effectiveness of these oils is extremely limited.

Kill the bedbugs

Home cleaning methods

You can first try to remove bedbugs without chemicals. These bugs are pretty easy to kill with high heat, 115°F (46°C), or intense cold , 32°F(less than 0°C

Here are a few ways to treat bedbugs using these methods:

  • Wash bedding and clothes in hot water for 30 minutes. Then put them in a dryer on the highest heat setting for 30 minutes.
  • Use a steamer on mattresses, couches, and other places where bedbugs hide.
  • Pack up infested items in black bags and leave them outside on a hot day (95 degrees) or in a closed car. In cooler temperatures, it can take two to five months to kill sealed-up bugs.
  • Put bags containing bedbugs in the freezer at 0°F (-17°C). Use a thermometer to check the temperature. Leave them in there for at least four days.

Once you’ve cleaned all visible bedbugs, make the area inhospitable for their friends. Place bedbug-proof covers over your mattress and box spring. Zip these covers up all the way. Bugs that are trapped inside will die, and new bugs won’t be able to get in.

If these methods don’t wipe out all the bugs, you may need to try an insecticide.

Non-chemical and chemical treatments

Insecticides can help rid your home of bedbugs. Look for products that are EPA-registered, and specifically marked for “bedbugs.”

Here are a few types of insecticides you can try:

  • Pyrethrins and pyrethroids are the most common chemicals used to kill bedbugs. Yet some bedbugs have become resistant to them.
  • Pyrroles like chlorfenapyr kill bedbugs by disrupting their cells.
  • Neonicotinoids are man-made versions of nicotine. They damage the bugs’ nervous system. This type of chemical works on bedbugs that have become resistant to other pesticides.
  • Dessicants are substances that destroy the bugs’ protective outer coating. Without this coating, the bugs dry out and die. Two examples of dessicants are silica aerogel (Tri-Die and CimeXa) and diatomaceous earth. The advantage to dessicants is that bedbugs can’t become resistant to them, but they work slowly. These products can take a few months to kill off all the bugs.
  • Foggers or bug bombs kill bedbugs, but they can’t get into cracks and crevices where these bugs hide. They can also be toxic to humans if you use them incorrectly. Read the label carefully. Leave the room before you set off a fogger.
  • Plant oil-based products like EcoRaider and Bed Bug Patrolare less toxic than chemical insecticides, and they work well against bedbugs.

How to Use a Spray to Kill Bed Bugs on Mattresses

When you use a spray to kill bed bugs, you have to apply it directly to them. This is easier said than done because they’ll do anything they can to avoid you or get away from you. So, how can you effectively kill them with a spray? Here’s how.

  • Get prepared. Purchase or make your spray, and have it ready with you. Tidy the room before you begin by picking up anything off the floor, and bagging all of your clothes in preparation to wash them. Seal the bags and leave them outside for the time being.
  • Get started by flipping the mattress. Start spraying immediately, taking care to hit any bed bug that’s scurrying away. Pay special attention to the piping of the mattress, spraying it all the way around to kill any bed bugs or their eggs hiding there.
  • Wipe down the main area of infestation with a damp cloth, and bag it before you leave the room. Wiping the area down will get rid of any lingering smell. If you didn’t know, bed bugs find their home by searching out its smell.
  • Repeat this process with nearby furniture, or anywhere else they might be hiding (bar electrical outlets, since it’s best not to spray those.)
  • Once you’re done, wash the clothes that you bagged. Put the bag itself into the washing machine before you open it, and dump the clothes directly inside. Wash for at least half an hour at a high temperature to guarantee that you kill both the bed bugs and their eggs.

It’s important to repeat this entire process, too. Sprays like these will not be able to kill all bed bugs in just one pass. You have to keep at it, and basically, make their lives hell.

As the study on EcoRaider above shows, bed bugs will remain for at least 12 weeks after just one spray. So, perhaps after six weeks, you could spray again to hasten the process.

What To Do If You Have Bed Bugs

There’s no question that bed bugs are exceptionally hardy creatures.  But what does this mean for infestation victims?

This probably isn’t the news you wanted to hear, but unfortunately, the fact of the matter is that you simply cannot afford to wait your bed bugs out.  Not only will the infestation fail to clear up on its own — it will spread and intensify with each passing day. Studies show that bed bugs can live up to one year without feeding, and even longer given certain environmental circumstances.  Given that female bed bugs can lay between two to five eggs per day, an ignored or mismanaged infestation can quickly turn into an unbearable and expensive situation.

Remember, bed bugs have entered your space for one reason only: to feed on you.  As long as you remain in your home or apartment, your bed bugs have no reason to travel elsewhere.  Why would they, when they can easily feed on your blood night after night as you sleep?  Bed bugs will not abandon a stable, readily accessible food supply — unless you give them a reason to.

The longer you wait to contact a licensed and certified pest control professional, the more bed bugs you will have.  The more bed bugs you have (and the longer you have them), the greater your risk of exposure to serious illnesses like Chagas Disease and hepatitis B becomes.  Finally, prolonged infestations are more difficult to eradicate successfully, which simply means greater expense and inconvenience to you.

On the other hand, you can minimize the risk of sustaining serious injuries or property damage by intervening during the early stages of infestation.  The sooner you contact a licensed pest control company, the easier it will be to exterminate the bed bugs and return to your normal life.  If you are a renter, talk to your landlord before contacting a pest control company yourself.  Depending on the provisions of the municipal code applicable to your city or county, it’s possible that your landlord is responsible for bed bug treatments.  Expenses related to eradication may not necessarily have to come out of your pocket.

Do I Have To Treat My Whole House If I Get Bed Bugs?

Recently, it has been found that bed bug infestations are on the rise. This is mainly due to increased travel. Generally said to have not originated in the United States, after their arrival bed bugs spread like wildfire. The good news is that bed bugs are not known to spread any disease or pathogens. The bad news is that they are known to be one of the hardest pests to get rid of! Should you find a bed bug infestation, you should immediately seek out professional help.

Bed bugs come from a number of places and taking steps to prevent them is always in your best interest. Your daily routine can put you into contact with bed bugs a number of times and though hard to avoid entirely, you can use these prevention tips to help.

  • Keep personal belongings off the floor/ground. Often times when you set your belongings on the ground in places that have high human traffic such as mass transit, hotels, motels, and even retail stores, you can pick up bed bugs without even knowing it. Whether it be a coat, purse, or suitcase, try and keep items off of the floor.
  • When cleaning, make sure to vacuum thoroughly. Always focus on creases and stitching of upholstery. Making sure to vacuum around things like buttons and folds. Bed bugs are tiny and can hide in very discreet locations.
  • Inspect. When entering a room where you do have to set belongings down, like in hotels or at homes you might be a guest at, always inspect it first. Focus on places like on and under bedding as well as under rugs. If you find bed bugs, leave the room immediately.
  • Check bed bugs at the door. If returning from somewhere in which you brought luggage to, try and unpack it outside of your home. Make sure to wash all clothing you had brought with you, even if unused.
  • Keep items stored properly. When traveling, always store items inside of your luggage in separate sealable bags. Try and keep unused items left unopened.

Taxi Truck Courier Loading Services

MOVING LABOR

Professional Moving Labor Services

Moving labor is a popular service for residential and commercial moving. As part of labor only moving services can simply load or unload all or part of your household items during your move.  The loading process can be very time consuming, and it is impressive how much experts can safely accomplish in a short amount of time!  DIY loading and labor that may take 6-8 hours is easily done in a fraction of the time.   By choosing to hire professional movers to make sure everything is loaded or unloaded properly in your moving truck or POD, you will reduce damage and potential issues during your move.  Opt to have load everything in your move, or choose to have help with furniture, appliances and other large items.

Hiring Moving Labor to Load or Unload Your Moving Truck

labor services are very popular for the do-it-yourself mover who needs a helping hand with labor-intensive moves. If you have already rented a truck and need a few extra hands, then Moving Ahead Services has you covered. certified movers will quickly and safely transport your items to your moving truck or POD, allowing you to concentrate on other aspects of your move.

Benefits of hiring our moving labor services

Not relying on friends and family

Save your energy for other aspects of moving

Stay in control of packing your items and organization

Safe and reliable loading to ensure nothing breaks in transit

Correct load balance for easy, safe driving

Great way to keep costs efficient

During the planning phases of your move experts will help you decide and plan for moving services that fit your needs and budget.  In addition to moving labor, pros provide packing services, full-service moving arrangements, cleaning services, storage, supplies and other essentials to ensure a smooth transition.

WHEN YOU BECOME A MOVING

CHOOSE WHEN YOU WORK

Stay in control of the hours and days you want to work. Whether you want to make this a full time or part-time career, you can be your own boss. Use your online account to select which days and times you’re available to help customers. Start your business today and help people move near you!

GIVE YOU THE CUSTOMERS

You give us your availability and hard work and give you the customers. Hundreds of customers need your help every day. When you sign up as a Moving Help Service Provider, your business will be listed on to allow customers to find and use your services for their move. After they book your business through one of these sites will notify you when the job needs to get done.

NO COST TO JOIN

No start up costs or monthly fees when you become a Moving Help Service Provider. movers provide their own rates and Moving Help charges a flat 15% marketplace fee when a transaction is completed. You get paid when the job is done and the customer is completely satisfied.

COLLEGE STUDENTS

When you work as a Moving Help Service Provider, you get to set your own schedule and work as many hours as you’d like each week. That’s why being a Moving Help Service Provider is perfect for the college students who may have to work around class schedules and homework.

PART-TIME WORK

Many Moving Help Service Providers work part-time outside of their career to make extra money on the side. What’s even better is you are your own boss – so work the jobs that you want and the hours that work best for you!

The Ultimate Guide to Moving Checklist

Whether you’re looking for moving tips for an apartment in the city or a house on the beach, you’re in the right place. You’re probably feeling disoriented and stressed as you’re trying to figure out how to prepare for the move, but we understand! We’ve moved a thing or two, and it is a mountainous job!

Find a New Place

If you’re here, you most likely have already accomplished this but we’re going to say it anyway — if you haven’t signed a contract for a new house or apartment, this is a great first thing to do. It’ll usually give you a concrete deadline for when your home should be packed and ready to move.

Make a Packing & Moving Timeline

Once you know when and where you’re going, grab a calendar. Take a long realistic look at how many days you have to pack, update addresses, inform doctor offices, break the news to friends, etc. Being realistic is key! Obviously take into account all current life commitments, but also make sure you make room for spontaneous happy hours, movie nights, or whatever else you’re into. Unless you have to move ASAP, giving yourself wiggle room will keep your brain from scrambling into a fistful of packing peanuts.

to plan for packing, be honest with yourself and know how much packing-per-day you can manage. Here are a couple packing plans we’ve come up with:

The “Short Spurt High Intensity” packing plan. This works best if you can pack for 1-2 hours every day leading up to the day you move. Those with short attention spans benefit the most from packing in short but daily intervals. It’s also great for people that have jam-packed schedules and can’t afford full packing days. Depending on how much you have to move, you need to start several weeks or even months before it’s time to move, especially if you want to allow for “off” days.

The “Classic” packing plan. If you prefer a ripping-off-the-bandaid method, set aside several days and estimate each room will take about 3-5 hours to pack. That’s a very general time frame though. How long it actually takes depends on how many drawers, cabinets, nooks and crannies you have accumulated stuff in. Do this a weekend or two before you have to move just in case you run out of steam and leave yourself with a half-packed home.

Moving Boxes

Surprise! You need cardboard boxes. These are quite expensive when you buy them brand new, so save yourself some money here because, if you haven’t noticed, moving is expensive! You can get free used boxes from places like Target, book stores, friends that recently moved, and basically any location that is accommodating to customers.

Small Moves

Moving is never easy. There are a lot of complications involved with a change of address

What qualifies as a small move?

For example, you may have a piano that weighs 600lbs and that’s the only item you will be moving or you have 1,500lbs of moving boxes packed with some furniture. That’s perfect! try hardest to accommodate and customize your move the way you want it.

As small move experts, can offer two distinct advantages:

1. Lower cost! When you share space on a van with others, you are “sharing the cost” as well as decreasing your cost of moving. Sharing a whole truckload with other customers saves you money.

2. are trained, professional movers. You receive door to door inside delivery with full blanket service, the same as if you had a large load.

Advantages of using small moves services

Save money with low weight minimum. Most other moving companies look to move large 5,000-15,000 loads and have a 2,000 minimum. does not require high minimum poundage for small moves. In fact, low required minimum is approximately 400. For example, if you have 500 or 800 to move, will only charge you for the exact amount of pounds. This differs from most moving companies, who will charge you for the full 2,000. save you money.

Protect your furniture. Small moves are specialty. are experts at it. Each piece of furniture is wrapped in blankets and placed in vans to ensure its safe delivery to you. You will not be charged “extra” for protecting your items in blankets or using tape. Upon delivery, will place your items exactly where you want them in your home.

xamples of small moves are:

A college student’s dormitory room

An estate sale or “estate distribution” where the owner of a home is sending furniture to other family members in different parts of the country

A piano going from Los Angeles to New York

A dining table, six chairs and a buffet going from say,

A two-room apartment

Moving FAQs

Frequently Asked Questions When You Plan a Move

It is sometimes said that moving is life’s third greatest source of stress, behind only divorce or the death of a loved one. That’s a pretty weighted undertaking. When you plan a move with Moving Company, you will find this doesn’t have to be the case.

Why should I hire a professional mover?

Hiring a professional mover delivers exceptional value on a day that can otherwise be very stressful. Moving can be both emotionally and physically draining, and handling delicate or bulky items with care requires specific moving skills. highly recommend turning to professionals for this, as you would for many of your households needs, such as plumbing and electricity.

How much will my local or long distance move cost?

base an estimate for a local move on an hourly rate, which includes the drive time for each leg of the move:

from the moving company to your original home,

then to your destination, and

back again to the moving company.

Pricing for a long distance move is based on a flat rate, fixed price. Once have taken an inventory of your furniture and other belongings, and identified a timeframe for delivery, are happy to provide a binding price for your move. If you prefer, can also price a long distance move by weight.

Is moving labor the only moving expense I should expect?

Moving labor represents the majority of the moving expense. However, you should also budget for packing supplies, such as moving boxes and tape, and for additional valuation (moving insurance) as needed. takes special precautions with delicate or oversized items, such as flat screen televisions and chandeliers. These items often require a custom wooden crate, which will incur an additional fee.